
The luxe world
An introduction to working with the luxe world APIs.
Outcome / Goals
In this tutorial we'll use the World api to put something on screen.
We'll also use a module, called Arcade for handling physics + collision.
We'll load scenes and create prototype instances to populate a world,
and create a custom Modifier.
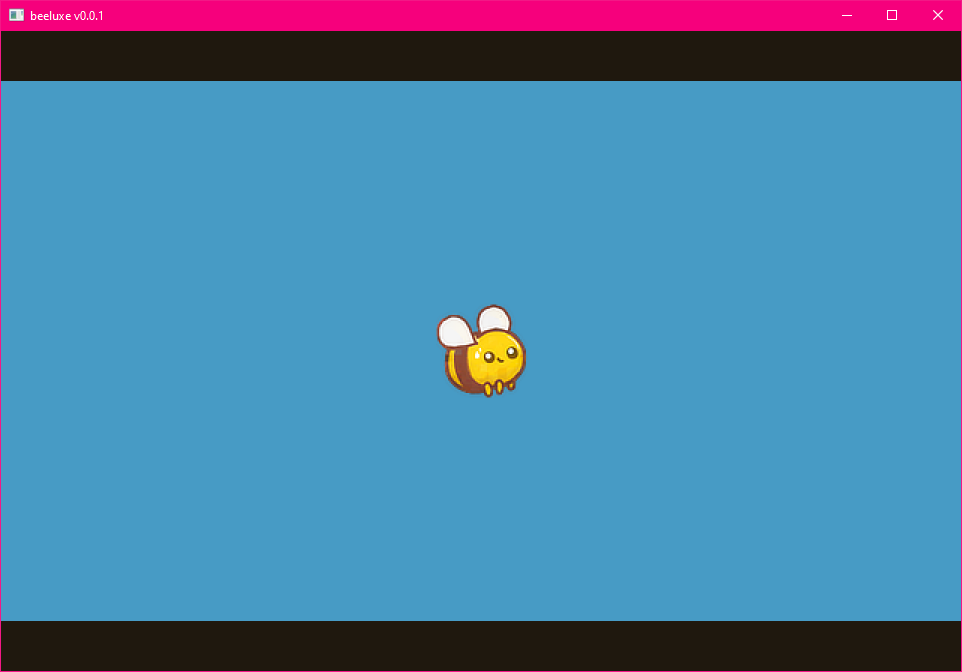
We'll make a game where you play as a bee, and have to bounce on flowers.
Play it
Click first, then press Left Button, Up, W, X or Space to jump.
Press R key to reset.
What is an API
Officially, it stands for "Application Programming Interface". That's a fancy way of saying "functions we call to do stuff".
We're the programmer, and we're talking to the application! The way we communicate is through an interace. Like a user interface, this is a code interface.
The API is a tool we use to call functions, e.g the Transform system provides a Transform API to do transform related stuff.
So any time you see API, you can say tool.
Creating the project
For this tutorial, create a new project using the launcher, and when choosing an outline, select the tutorial project outline. This project is pre-configured so we can dive right in.
Create a new project using the Tutorial Project outline! Not the empty one!
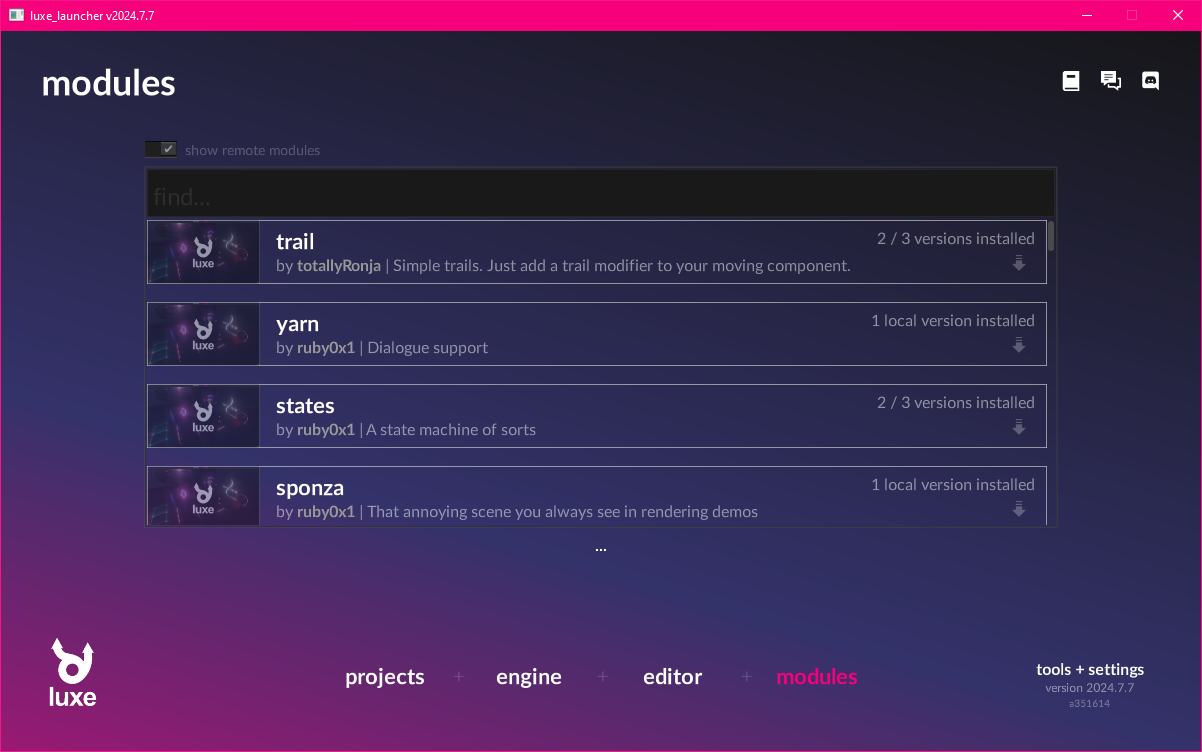
Installing a module
In order to run our project, we first need to install a module. If you don't, you'll get errors!
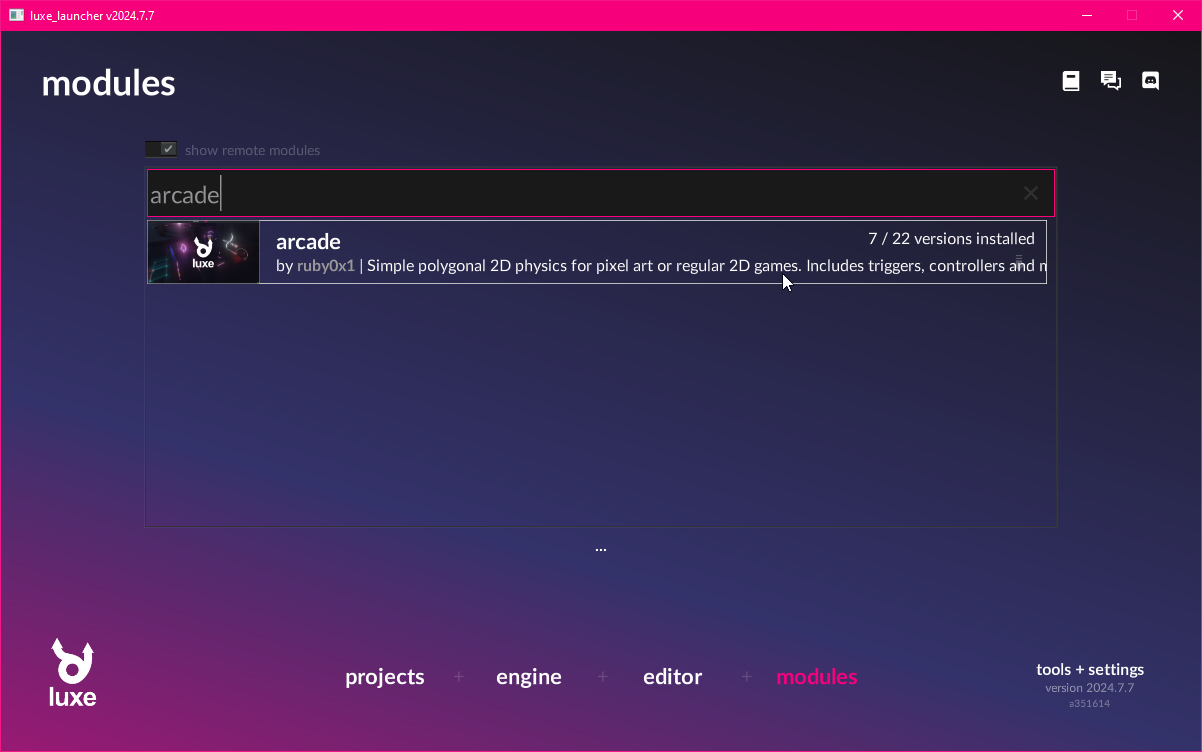
You can use the launcher to install modules. Head over to the module page, and search for the arcade module. Once you find it, you can click through, and click the download arrow.
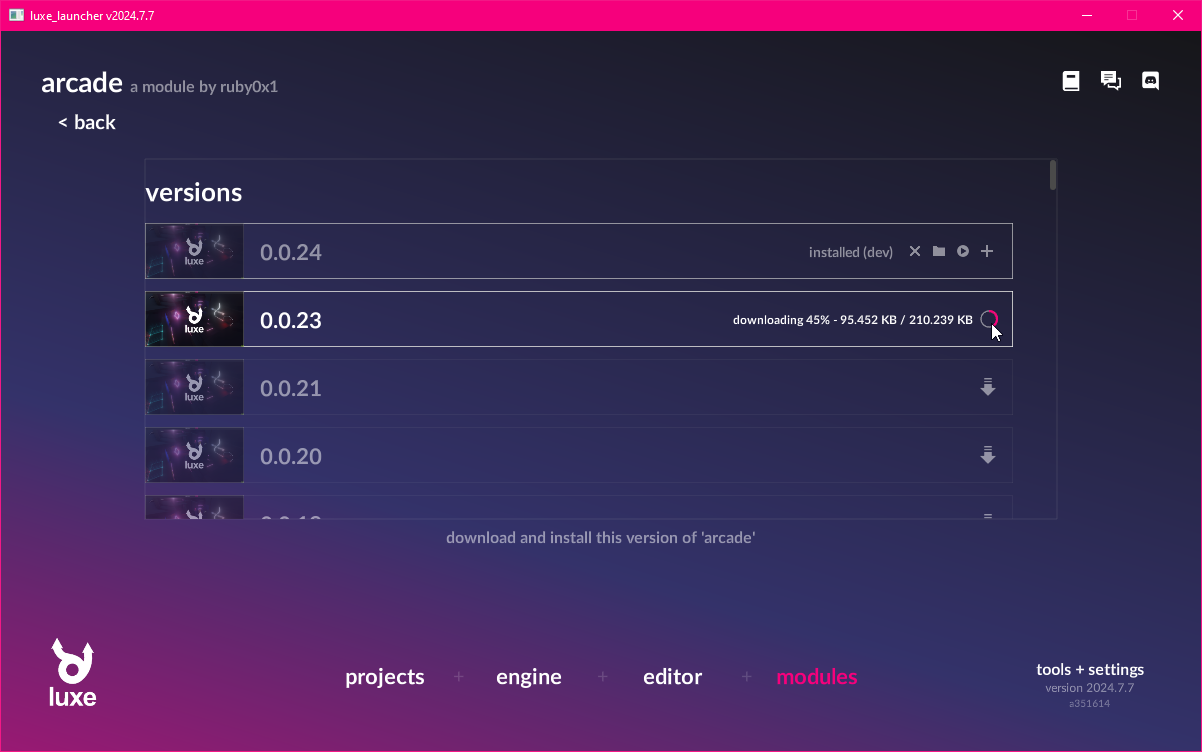
The project is configured to use version 0.0.24, install that version.
Install arcade version 0.0.24 to continue!
Using the module in a project
If you look inside of the luxe.project/modules.lx file you'll find the luxe and arcade modules referenced by version.
You can use the launcher to add a module to the project using the + icon, or you can manually add it to this file.
In this case, it's already there from the outline, so let's move on!
The Transform API
In the Draw tutorial, we drew a circle in the center of the screen using an immediate style API.
With the world system, we can create things in the world that will continue to draw as long as they're alive. An Entity in the world can also have modifiers attached that perform logic, and run gameplay code.
We saw this in the original empty project template, right before deleting it!
To create an entity, we do Entity.create(world) - this gives us a blank entity, and is ready to be modified to give it meaning.
The first thing we'll do, is attach a Transform modifier. Modifiers use the same create pattern,
and some modifiers add create functions with convenience arguments, like we'll see below from Sprite.create.
Let's create a new player variable in our game, and then inside ready we'll create an entity, attach a transform and a sprite to it.
world_width/world_height ?
Since our tutorial outline is based on the pixel outline, we have a fixed world size that will auto scale. This size is set in outline/settings.settings.lx and the size of the world is available in world_width and world_height. This is different from width/height, which is the window size.
add the highlighted code to ready
class Game is Ready {

  var random = Random.new()
  var draw: Draw = null

  var player = Entity.none

  construct ready() {

    super("ready! %(width) x %(height) @ %(scale)x")

    draw = Draw.create(World.render_set(world))

    player = Entity.create(world, "player")
    Transform.create(player, world_width/2, world_height/2)
    Sprite.create(player, Assets.image("image/bee"), 64, 64)

  } //ready
And just like that, we have our player in the middle of the screen.
Arcade physics
The arcade module provides collision + physics for a wide range of games, and comes with a bunch of ready to use tools.
The first important one is the Arcade modifier, which gives an entity a collider shape, and allows you to choose flags like whether it's solid or a trigger, what shape it is, change the velocity and more. It also gives us a callback for when we collide with something, so we can implement a response to overlapping or colliding with something.
Arcade import
We're gonna use the Arcade modifier and some services from the arcade module to make our bee interact with the world.
We'll import that module into the top of our game.wren code like this:
import "arcade: system/arcade.modifier" for Arcade, CollisionEvent, ShapeType
We can see the import part contains arcade: up front. This should be familiar, luxe: imports are from the luxe module! Like luxe: color belongs to the luxe module. Imports without a prefix like that, usually belong to the project!
Attach an arcade modifier
Much like a Transform or Sprite, we can attach Arcade to an entity using the same create pattern.
Let's tidy up and make a create_player() function, and move our player code into it.
add the highlighted changes
construct ready() {

  super("ready! %(width) x %(height) @ %(scale)x")

  draw = Draw.create(World.render_set(world))

  create_player()

} //ready

create_player() {

  player = Entity.create(world, "player")
  Transform.create(player, world_width/2, world_height/2)
  Sprite.create(player, Assets.image("image/bee"), 64, 64)

  Arcade.create(player)
  Arcade.set_shape_type(player, ShapeType.circle)
  Arcade.set_radius(player, 32)

}
If we run this, it will look identical to before! That's because there's no gravity or anything on our entity.
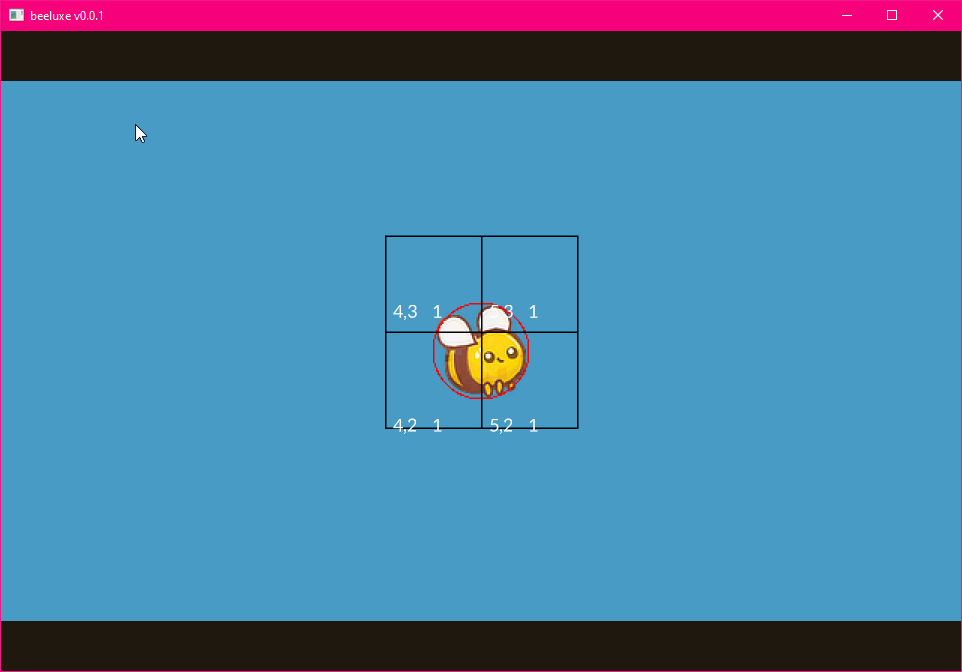
So how do we know it's working? How do we know the radius matches? We can ask Arcade to debug draw the physics state.
add the highlighted line to create_player
...
Arcade.set_radius(player, 32)
Arcade.set_debug_draw_enabled(world, true)
Gravity is a constant acceleration, so we can use the Arcade.set_acc tool to add a downward acceleration.
The value is relative to your world size, and is game specific. For this game, we'll pick -200 as that feels good.
You can make it whatever you want!
add the highlighted line to create_player
...
Arcade.set_radius(player, 32)
Arcade.set_acc(player, [0, -200])
Arcade.set_debug_draw_enabled(world, true)
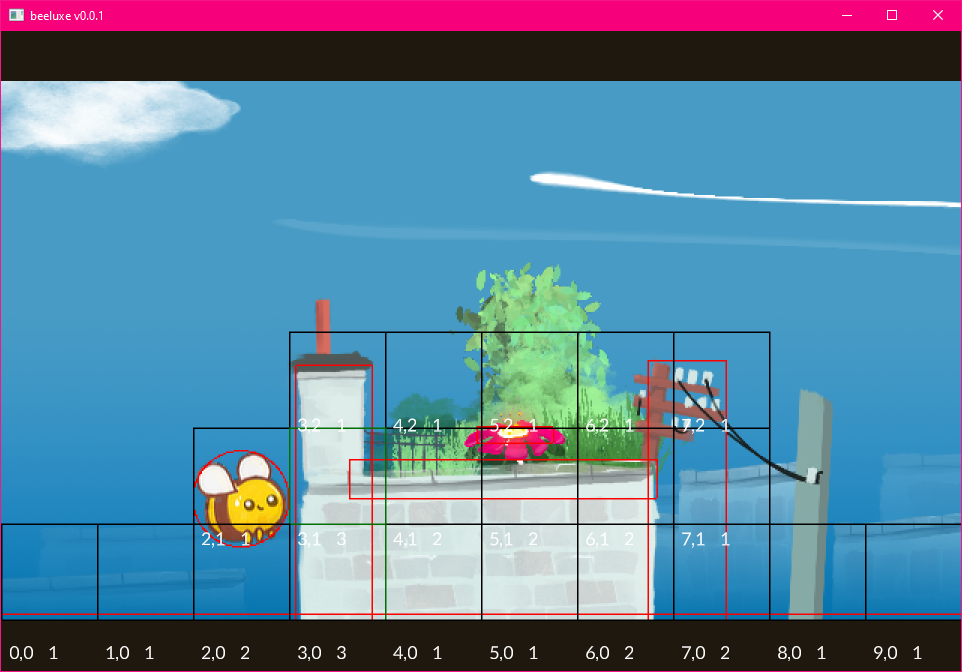
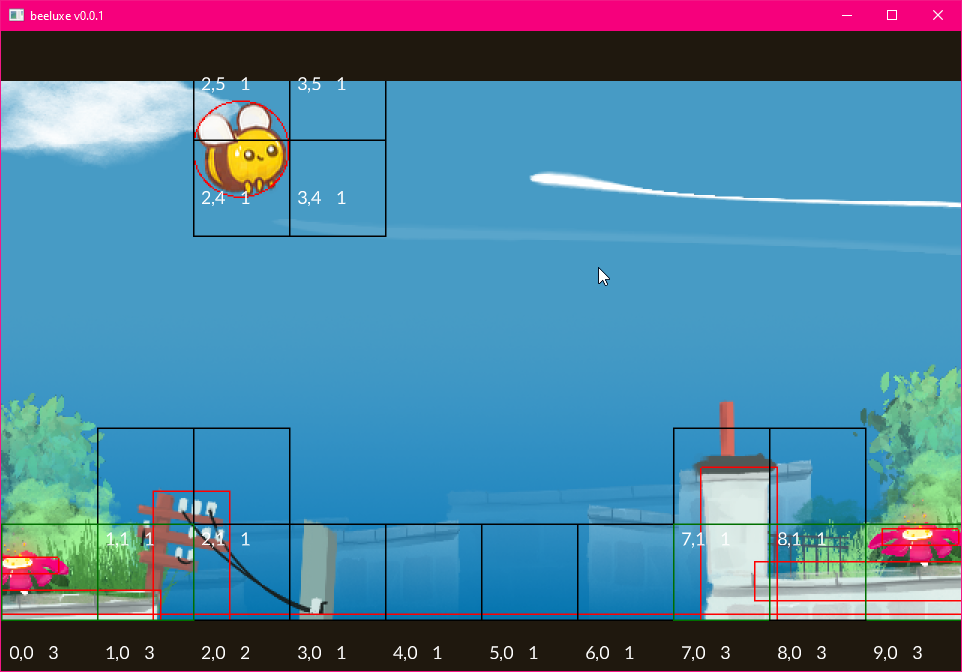
If you run this now, you should see the bee falling off the bottom of the world!
Loading a scene
Our outline includes a scene that has been created for us. This scene includes some background details, and a floor collider which will keep our bee on screen.
A scene is a kind of data based asset, a container for pre-configured entities with their modifiers already attached.
A particular scene can only be loaded once into the same world, but you can load multiple scenes into the same world. This makes them useful as a tool to layer or keep things loaded in the world, and much more. Scenes are typically what you would use for stuff like a Menu, or Level based games.
Scene assets
Scenes are typically created with the luxe editor, but they're simple data inside of a folder.
Take a look inside the scene/level.scene/ folder, and look inside any .entity.lx file!
With Scene.create we can load a scene from an asset. We'll use the Asset.scene(id) to grab the asset handle of the scene.
Work In Progress Asset API
The Scene API is available via import "luxe: world/scene" for Scene and is imported already.
Some assets, like the image above, use the older Assets.image(id) API (plural), while the scene and newer assets use Asset.scene(id) API (singular). The reason both exist is because we're moving to the new system and some assets aren't done moving yet.
Just before we create our player, we'll load our level scene into the world.
Add the highlighted line in ready, inside game.wren
construct ready() {

  super("ready! %(width) x %(height) @ %(scale)x")

  draw = Draw.create(World.render_set(world))

  Scene.create(world, Asset.scene("scene/level"))

  create_player()

} //ready
With that, we'll see the clouds, some buildings, a gradient and we'll see the floor collider. The bee will bounce off the floor, and we're ready for the next step.
Named input events
In the first tutorial, we used Input.key_state_released to directly query a key.
This is great for quick prototypes but doesn't allow multiple keys, gamepads, or mouse inputs easily.
For that we'll need to use named input events. A named input event is what it sounds like, a name assigned to one or more inputs!
We have a few of these already defined by our project, if you look inside of outline/inputs.input.lx you'll see this:
jump = {
  keys = ["key_x", "up", "key_w", "space"]
  mouse = ["left"]
  gamepad = [0]
}
If we query this instead of the individual key, any of those inputs will trigger the event. Since these are named events we refer to them by a string value, "jump", but using strings all over our project can lead to code that can be difficult to change.
Instead, what we'll do is make an enum-like class that makes our code easier to use, and gives us code completion and errors if we spell it wrong. The pattern is a static function that returns a string, so we'll make one called In and a function called jump, so we can use In.jump to refer to the event name.

class In {
  static jump { "jump" }
}

class Game is Ready {
...
Implementing jump
Now inside our game class in game.wren, we'll add a jump function to make the bee jump.
To do that, we'll get the current bee velocity, add to it, and then re-apply it. We'll also set the x (horizontal) velocity to 0, because we never want the bee to move horizontally in this game.
jump() {

  var velocity = Arcade.get_vel(player)

  velocity.x = 0
  velocity.y = velocity.y + 150

  Arcade.set_vel(player, velocity)

} //jump

tick(delta: Num) {

  if(Input.event_began(In.jump)) {
    jump()
  }

...
Now when we run the game and press Up, W, X or Space the bee will jump upward.
Player position and speed
The bee jump is a little easy to go off screen, so we'll make a minor change to create_player() to give them a max speed, and we'll also enforce that the bee is always in the same position on screen, about a quarter of the way in.
create_player() {

  ...

  Arcade.set_acc(player, [0, -200])
  Arcade.set_max_speed(player, 150)
  Arcade.set_debug_draw_enabled(world, true)

}
Inside tick, we'll set the player position to world_width / 4 every frame.
tick(delta: Num) {

  Transform.set_pos_x(player, world_width / 4)

  ...
Now when we play, we have a couple jumps before we leave the screen, and our bee is in a nice place for the game.
Create a Prototype instance
Prototypes are similar to a Scene, in that they are a bundle entities, already set up with their modifiers, ready to create!
Prototype vs Scene
Prototypes are not limited to one per world like scenes. You can create many instances of the same prototype in the world.
They can be created from code, like we will below, or they can be placed inside a scene. They can also be placed inside of other prototypes! Each instance can have the values from the prototype overridden when placed that way, making it unique.
Our project includes a pillar ready to go as prototype/pillar.0 (we'll make more with the luxe editor in the next tutorial).
We'll create a create_pillar function, and we'll call it right after creating the player.
To create a prototype we use Prototype.create and Asset.prototype similarly. This returns a prototype root entity, which allows us to move the whole instance as a single unit.
  ...
  create_player()
  create_pillar()

} //ready

create_pillar() {

  var pillar = Prototype.create(world, Asset.prototype("prototype/pillar.0"))
  Transform.set_scale(pillar, 0.4, 0.4)
  Transform.set_pos(pillar, world_width / 2, random.int(15, 170))

} //create_pillar
With that, you should see a pillar spawned in the center of the world.
Creating a custom modifier
The next step is to move the pillars across the screen, so the player will have to jump over them.
There's a more detailed guide on custom modifiers here
To do that, we want to make a modifier that will move any pillar that it is attached to, and when the pillar moves off the left of the screen, clean itself up.
Create a folder called system/ in the project
The convention for modifiers is to be in a folder called system/, they are a wren file with a .modifier.wren extension. The .modifier. part luxe calls a subtype.
We're gonna make a modifier called pillar and copy paste the code below into it.
Create an empty file called system/pillar.modifier.wren in the project
import "system/pillar.modifier.api" for API, Modifier, APIGet, APISet
import "luxe: world" for Entity, Transform
import "luxe: render" for Render, Geometry
import "luxe.project/asset" for Asset
import "luxe: assets" for Strings
import "luxe: game" for Frame

#block = data
class Data {

}

#api
#display = "Pillar"
#icon = "image/pillar.svg"
#desc = "**A moving pillar**. Moves the pillar horizontally toward the player, then removes itself when offscreen."
class Pillar is API {

}

#system
#phase(on, tick)
class System is Modifier {

  init(world: World) {
    Log.print("init `%(This)` in world `%(world)`")
  }

  attach(entity: Entity, pillar: Data) {
    Log.print("attached to `%(Strings.get(Entity.get_name(entity)))` `%(entity)`")
  }

  detach(entity: Entity, pillar: Data) {
    Log.print("detached from `%(Strings.get(Entity.get_name(entity)))` `%(entity)`")
  }

  tick(delta: Num) {
    each {|entity: Entity, pillar: Data|

    }
  }
}
Attach the modifier
Do this: Import your modifier in game.wren
Add import "system/pillar.modifier" for Pillar at the top of game.wren.
Now that we have a modifier, we can attach it in the same way that we do for the built in ones.
We'll also modify our start position for the pillar, by setting it to world_width + 128 instead.
import "system/pillar.modifier" for Pillar
...
create_pillar() {

  var pillar = Prototype.create(world, Asset.prototype("prototype/pillar.0"))
  Transform.set_scale(pillar, 0.4, 0.4)
  Transform.set_pos(pillar, world_width + 128, random.int(15, 170))
  Pillar.create(pillar)

} //create_pillar
When you run this, you'll also see the line in the log:
[system/pillar.modifier line 29] - attached to
prototype/pillar.042951770139
You also won't see the pillar! So let's make it move.
Moving the pillars
Inside our pillar.modifier.wren there's a Data class, which was empty at the time.
For our pillar to move, we'll need a speed value and we can store the speed value in this class. The data class is per entity data, and is a little bit special. The fields require a type definition, and often have extra tags to configure how the data works.
Add a speed variable like this with a default value of 100:
class Data {
  var speed: Num = 100
}
Now we can use the tick function of our new modifier, to move our pillar. Once it goes off screen, we can destroy the pillar so it doesn't keep building up.
Systems are one per world
A modifier system sees all entities that is attached to, rather than on an individual entity level. We can see this in the tick function, it has an each function which will hand us each entity and the data for that entity.
Inside the tick function of our modifier, we are handed the entity that we're attached to. This entity is the prototype root of our instance, because that's the entity we attached it to.
When the pillar goes off screen, we'll see this in the log:
[system/pillar.modifier line 34] - detached from
prototype/pillar.042951770139
The Frame.end {} runs a function at the end of the frame. This is a WIP requirement for this Entity.destroy
tick(delta: Num) {
  each {|entity: Entity, pillar: Data|

    var x_now = Transform.get_pos_x(entity) - pillar.speed * delta
    Transform.set_pos_x(entity, x_now)

    if(x_now < -256) {
      Frame.end { Entity.destroy(entity) }
    }

  } //each
} //tick
More pillars
We're back inside of game.wren
We probably want more than one pillar to come across the level, so we'll use a tool called World.schedule(world, time, fn).
This calls a function for us every time seconds, but the important part is that it is affected by the world rate.
If we used Frame.schedule(time, fn) it would be global, and not world specific. With World.schedule we can pause by setting the world rate to 0.
  ...
  ... //existing code
  create_player()

  create_pillar()
  World.schedule(world, 6, 9999) {
    create_pillar()
  }

} //ready
And with that change, we now get a constant stream of pillars to jump over! We have one more important thing to do to finish this tutorial.
Handling collision
Our last step for this game is handling what happens when you hit something.
If you saw the moving pillar video above, the player goes through the walls and keeps jumping forward because of our code to keep it in the same spot.
Instead what we'll do is check the direction of the hit, and if you hit a wall (sideways), pause the game world. The direction check is using a math function called the dot product.
Dot product as a direction check? What is the dot product...
We don't really have to dig too deep right now, Math.dot returns < 0 if something is behind us, and > 0 if it's in front. It also tells us just how much it is in front, between 0 and 1. 1 being directly in front, 0 being to the side!
  ...

  handle_collision()

} //ready

handle_collision() {

  Arcade.add_collision_callback(player) {|entity_a, entity_b, state, normal, overlap_dist|
    if(state != CollisionEvent.begin) return

    var dot = Math.dot2D(normal, [0,1,0])

    if(dot.abs < 0.8) {
      World.set_rate(world, 0)
    }

  } //collision callback

} //handle_collision
You can see here we bounce off the top of things, but when we hit the side wall, we stop.
Polishing
The collision check is a little abrupt, and isn't very fun because it's super precise and you can fail easily.
To make the game a bit more fun, we'll add some squishy behaviour.
Often when learning through tutorials, you'll encounter things we don't yet fully understand. It's ok to just copy the code example here to improve the experience!
When we hit a collider, we get the height and check the distance. If the distance is less than 32 (half the radius of our bee), we've just hit the edge of the collider with the bottom of the bee and we can ignore it.
Another tweak, we'll play a bounce animation when we hit a flower. This also uses the Tags modifier, which allows us to tag entities with specific tags and check for them. In this case, our flower entity inside the pillar prototype already has a tag.
handle_collision() {

  Arcade.add_collision_callback(player) {|entity_a, entity_b, state, normal, overlap_dist|
    if(state != CollisionEvent.begin) return

    var dot = Math.dot2D(normal, [0,1,0])

    var scale = Transform.get_scale_world(entity_b)
    var height = Arcade.get_height(entity_b) * scale.y
    var top = Transform.get_pos_y_world(entity_b) + (height * 0.5)
    var dist = (top - (Transform.get_pos_y_world(player) - 32))

    if(dot.abs < 0.8 && dist > 32) {
      World.set_rate(world, 0)
    }

    if(Tags.has_tag(entity_b, "flower")) {
      Anim.play(entity_b, "anim/bounce")
    }

  } //collision callback

} //handle_collision
Reset
One final task is to make it so you can reset the state so you can try again.
We'll add a reset() function, first we reset the player position, and unpause the world.
This is called from tick using a simple key check.
reset() {
  Transform.set_pos(player, world_width/4, world_height/2, 0)
  World.set_rate(world, 1)
}

tick(delta: Num) {

  if(Input.key_state_released(Key.key_r)) {
    reset()
  }

  ...
Now, our pillars will still be there, so we'll need to clear them up too!
We're now inside of pillar.modifier.wren
We could keep a list of pillars we created, and then clean them up like we did in the draw tutorial...
But the modifer system we created already knows about all of our pillars! It keeps track for us.
Let's add a public API to our pillar modifier, e.g Pillar.reset(world).
To do this, we'll add a function to the API class in our modifier. This function has access to a function called system_in, which gives us our system to call into.
class Pillar is API {

  static reset(world: World) {
    var system: System = system_in(world)
    system.reset()
  }

}
Now inside of our system, we can add the reset function. This function will simply loop through each pillar, and destroy it.
class System is Modifier {

  ...

  reset() {
    each {|entity: Entity, pillar: Data|
      Frame.end { Entity.destroy(entity) }
    }
  }
And of course, don't forget to call it from our reset function:
reset() {
  Pillar.reset(world)
  Transform.set_pos(player, world_width/4, world_height/2, 0)
  World.set_rate(world, 1)
}
Debug off
One more tweak, now that we know it is working: turn off the debug drawer! We use a comment to disable the single line of code that set the debug drawing to active.
// Arcade.set_debug_draw_enabled(world, true)
Try this
Add score
Add a score variable to the game class, add 1 to it each time a flower is collected.
Add Game Over and a Win condition
Like before, make the experience more complete.
Experiment with values
Try randomizing pillar speeds, pillar schedule timing, bee velocities and more.
Final code
game.wren
import "luxe: world" for World, Entity, Transform, Sprite, Tags, Anim
import "luxe: draw" for Draw, PathStyle
import "luxe: render" for Material
import "luxe: game" for Frame
import "luxe: input" for Input, Key
import "luxe: assets" for Assets, Strings
import "luxe: asset" for Asset
import "luxe: math" for Math
import "luxe: string" for Str
import "luxe: io" for IO
import "random" for Random

import "luxe: world/scene" for Scene
import "luxe: world/prototype" for Prototype
import "arcade: system/arcade.modifier" for Arcade, CollisionEvent, ShapeType
import "system/pillar.modifier" for Pillar

import "outline/ready" for Ready

class In {
  static jump { "jump" }
}

class Game is Ready {

  var random = Random.new()
  var draw: Draw = null

  var player = Entity.none

  construct ready() {

    super("ready! %(width) x %(height) @ %(scale)x")

    draw = Draw.create(World.render_set(world))

    Scene.create(world, Asset.scene("scene/level"))
    create_player()

    create_pillar()
    World.schedule(world, 6, 9999) {
      create_pillar()
    }

    handle_collision()

  } //ready

  handle_collision() {

    Arcade.add_collision_callback(player) {|entity_a, entity_b, state, normal, overlap_dist|
      if(state != CollisionEvent.begin) return

      var dot = Math.dot2D(normal, [0,1,0])

      var scale = Transform.get_scale_world(entity_b)
      var height = Arcade.get_height(entity_b) * scale.y
      var top = Transform.get_pos_y_world(entity_b) + (height * 0.5)
      var dist = (top - (Transform.get_pos_y_world(player) - 32))

      if(dot.abs < 0.8 && dist > 32) {
        World.set_rate(world, 0)
      }

      if(Tags.has_tag(entity_b, "flower")) {
        Anim.play(entity_b, "anim/bounce")
      }

    } //collision callback

  } //handle_collision

  create_player() {

    player = Entity.create(world, "player")
    Transform.create(player, world_width/2, world_height/2)
    Sprite.create(player, Assets.image("image/bee"), 64, 64)

    Arcade.create(player)
    Arcade.set_shape_type(player, ShapeType.circle)
    Arcade.set_radius(player, 32)
    Arcade.set_acc(player, [0, -200])
    Arcade.set_max_speed(player, 150)
    // Arcade.set_debug_draw_enabled(world, true)

  } //create_player

  create_pillar() {

    var pillar = Prototype.create(world, Asset.prototype("prototype/pillar.0"))
    Transform.set_scale(pillar, 0.4, 0.4)
    Transform.set_pos(pillar, world_width + 128, random.int(15, 170))
    Pillar.create(pillar)

  } //create_pillar

  jump() {

    var velocity = Arcade.get_vel(player)

    velocity.x = 0
    velocity.y = velocity.y + 150

    Arcade.set_vel(player, velocity)

  } //jump

  reset() {
    Pillar.reset(world)
    Transform.set_pos(player, world_width/4, world_height/2, 0)
    World.set_rate(world, 1)
  }

  tick(delta: Num) {

    if(Input.key_state_released(Key.key_r)) {
      reset()
    }

    Transform.set_pos_x(player, world_width / 4)

    if(Input.event_began(In.jump)) {
      jump()
    }

    if(Input.key_state_released(Key.escape)) {
      IO.shutdown()
    }

  } //tick

} //Game
system/pillar.modifier.wren
import "system/pillar.modifier.api" for API, Modifier, APIGet, APISet
import "luxe: world" for Entity, Transform
import "luxe: render" for Render, Geometry
import "luxe.project/asset" for Asset
import "luxe: assets" for Strings
import "luxe: game" for Frame

#block = data
class Data {
  var speed: Num = 100
}

#api
#icon = "image/pillar.svg"
#display = "Pillar"
#desc = "**A moving pillar**. Moves the pillar horizontally toward the player, then removes itself when offscreen."
class Pillar is API {

  static reset(world: World) {
    var system: System = system_in(world)
    system.reset()
  }

}

#system
#phase(on, tick)
class System is Modifier {

  init(world: World) {
    Log.print("init `%(This)` in world `%(world)`")
  }

  attach(entity: Entity, pillar: Data) {
    Log.print("attached to `%(Strings.get(Entity.get_name(entity)))` `%(entity)`")
  }

  detach(entity: Entity, pillar: Data) {
    Log.print("detached from `%(Strings.get(Entity.get_name(entity)))` `%(entity)`")
  }

  reset() {
    each {|entity: Entity, pillar: Data|
      Frame.end { Entity.destroy(entity) }
    }
  }

  tick(delta: Num) {
    each {|entity: Entity, pillar: Data|

      var x_now = Transform.get_pos_x(entity) - pillar.speed * delta
      Transform.set_pos_x(entity, x_now)

      if(x_now < -256) {
        Frame.end { Entity.destroy(entity) }
      }

    } //each
  } //tick

}