
Wires (events)
This tool in luxe is a work in progress, don’t worry about rough edges.
Wires are a way to connect things
Section titled “Wires are a way to connect things”Not every user is going to be writing system code, that’s why modules exist, to share systems like Arcade so that more people have the option to make a game with less experience.
A big goal of luxe is to be approachable and accessible to a wider range of users, and one of the tools to do that comes in the form of what we call Wires.

Here we can see how they look in motion in the luxe editor (wip, as mentioned).
There are many ways to use this tool, but let’s take a look at two obvious examples of things you can do with or without using code:
- Switch -> Light: Connect a switch to the lights that it will control
- Trigger -> Door: Connect a trigger near to a door, it will open on enter
Outgoing wires
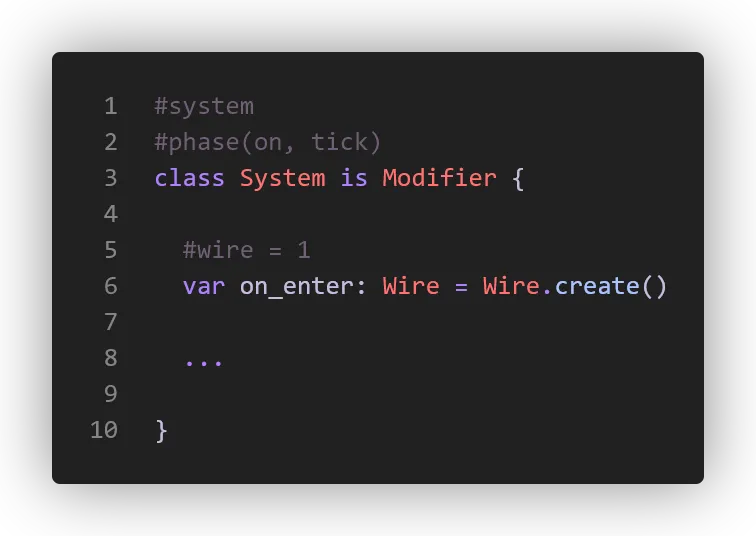
Section titled “Outgoing wires”Any modifier (or scene script) can expose a wire to send from (left hand side) or connect to (right hand side). We’ll take a look at a Trigger example. How do we define a wire to send across?
We define a variable and tag it with #wire and give it an id.
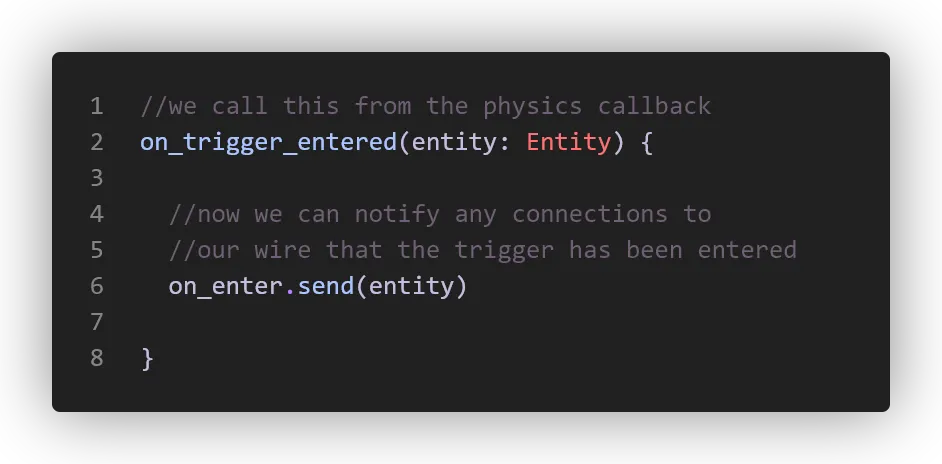
With that, we now have an outgoing wire. How do we send a message on the wire? Imagine we’ve connected to physics, here is how we trigger it:
Incoming connection
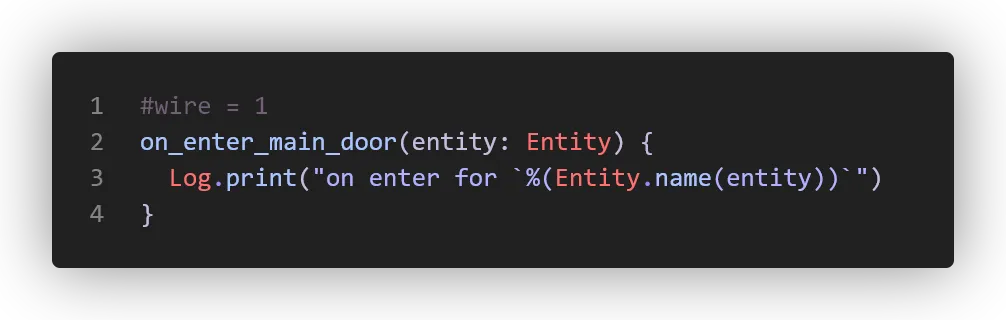
Section titled “Incoming connection”How do we make a function visible to send a message to, so it can show up on the right hand side for us to connect to?
We tag a function with #wire and an ID. That’s it!
There’s more to the system, like connecting via code. These show up in code completion and such. Here’s a real code example below, and you’ll notice we can also send full typed blocks across the wires - the contact argument shown.

From code
Section titled “From code”In our game we have a volume modifier that responds to things entering it.
We also have a Trigger modifier that does the work of speaking to the physics engine, and then sending a wire for us to use for convenience.
A modifier exposes it’s wires via connect and send on the modifier API class!
Trigger.connect.enter(world) {|entity: Entity, contact: Contact|  on_entered(entity, contact)}
//manually send an exit event to any listenersTrigger.send.exit(entity)
Typed data over the wire
Section titled “Typed data over the wire”We can see that there’s an optional data value for send and receive. This uses luxe ‘blocks’, which allows us to define data blocks using a Wren class definition.
We’ve used blocks already for our modifier Data class, but we can also make our own blocks for use with wires and more.
Here’s an example from an inventory system that sends change notifications:
The data definition
Section titled “The data definition”#block = dataclass InventoryChange { var kind: Kind = InventoryChangeKind.unknown #tag = "type/item.asset" var id: Asset = null}
#optionclass InventoryChangeKind { static unknown { "unknown" } static add { "add" } static remove { "remove" }}The outgoing wire
Section titled “The outgoing wire”We specify a #type attribute using the path of the data definition for our wire:
#wire = 1#type = "type/events/inventory.block"var change: Wire = Wire.create()Sending the event
Section titled “Sending the event”We use change.send(entity) to send an event without data, like we saw before.
This time we use change.send(entity, data) but how do we get that data?
An outgoing wire has a tool for this called prepare!
The prepare function returns a typed object ready to populate that we can send along: (Note that we type it explicitly for now for completion)
var event: InventoryChange = change.prepare() event.id = the_asset event.kind = InventoryChangeKind.addchange.send(entity, event)Receiving the event
Section titled “Receiving the event”And then we can listen for the event:
import "type/events/inventory.block" for InventoryChange, InventoryChangeKind
Inventory.connect.change(world) {|entity: Entity, change: InventoryChange|  var item = Asset.get.item(change.id)  if(item && change.kind == InventoryChangeKind.add) {    //...  }}